Lisa Hollerbach's Fifth Grade Quilt Project
Lisa shared this wonderful account of her work with fifth graders at Cottonwood Elementary School in Holladay-Cottonwood, Utah:
One day in mid-February, one of my sons came home from school and announced, "My teacher asked if any of our moms was a quilter, and I said that you were a good one. She wants to talk to you." The teacher said that the class had to do a service project, and she thought that a queen-sized quilt for donation to a charity would be just the right thing. "You're not a quilter," I said. "No." I knew that. Who would be crazy enough to organize 30 fifth graders to make a quilt? We scaled down the project a bit and agreed that we would only make a quilt top. We scheduled 1 ¼ hours every Monday afternoon for the project.
Week 1
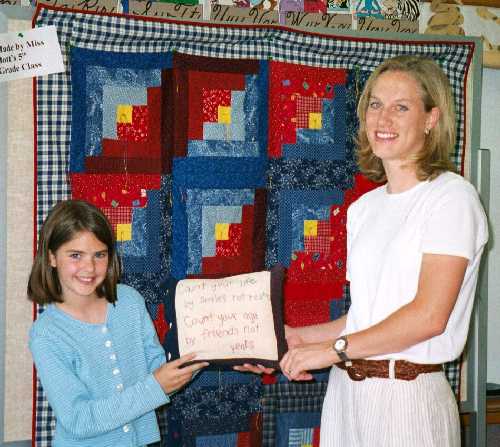
Ten and eleven-year-old children are beyond drawing pictures on squares of muslin with fabric crayons and having them sewn together by someone else. We were going to make a QUILT! The fifth grade curriculum includes American History, and the students were about to study the Civil War era. Using the book Hidden in Plain View as inspiration, I organized a lecture/quilt show of patterns mentioned in the book as 'hidden messages". I borrowed quilts from other quilters and from Gentler Times (our local quilt shop) so the students could see the real quilts. We discussed patterns and fabric selection and chose a red and blue log cabin pattern with a yellow center to represent "light in the window". The students were assigned to bring in a minimum of ¼ yard of red or blue 100% cotton fabric.
Week 2
With ¼ inch graph paper, the students drafted a 14" log cabin block in ¼ scale. They calculated the finished size of each log. They calculated the cut size of each log. They colored the drafts. They organized themselves into 4 groups.
Weeks 3 and 4
With the help of several other adult volunteers, the students were taught safe use of a rotary cutter and the proper technique to cut with a rotary cutter, gridded ruler, and self-healing mat. Using their drafts and measurement sheets, they began to cut strips, and cut the strips into logs. To keep everything organized, each group had a 14" pizza box to hold their fabrics and graph papers.
Weeks 5, 6, 7, 8
Sewing machines were brought into the classroom by adult volunteers, and the children began to sew with their groups, first with a lot of assistance and then mostly independently. We did not use pins, but finger-pinned the fabrics to avoid the obvious danger of broken pins. We sewed industrial style, sewing the first log on all of the blocks, then the second, etc. The students took turns arranging the logs onto the blocks and sewing on the machines. Each block was sewn by many students, and each student sewed parts of many blocks. The pressing of the blocks was done by an adult as it was difficult to supervise use of an iron in our work space.
Week 9
I hung a flannel sheet on the wall, and the students arranged their blocks for the quilt top. I sat in the back of the classroom and sewed the blocks together into the top. As you can imagine, not all of the blocks were exactly the same size, but they were close enough to meet at the corners with a little help from me. I hung the top on the flannel and we measured for the border fabrics. The students did the math, averaging the lengths of the seams to calculate the lengths of the borders. I sewed the borders. The students were too excited about the quilt top to stop now, and the teacher and I agreed to keep going and make it into a quilt, but we would tie the top instead of quilt it.
Week 10
We stretched the backing fabric on the floor, laid on the batting and the quilt top. The school has 5 "Community of Caring" values, so we tied 5 knots at the centers and corners of each of the blocks to represent these values. A very good friend and fellow quilter helped me to trim the edges of the quilt and sew on the binding in time for the Salt Lake Area meeting.
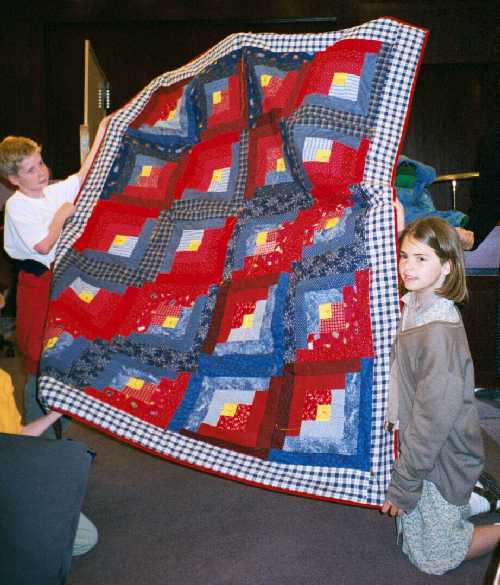
Five children piled into my Suburban the night of the meeting. We were blasting "In Sync" on the stereo, and they were singing and clapping as loudly as they could. They were quilters, off to a debut of their work. They were jazzed.
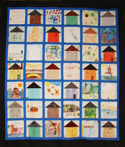
The fifth grade quilt is hanging in the school library, awaiting its donation to the Ronald McDonald House, and in the fine company of Jody Warner's storybook quilts. And, since you are wondering, we only needed one bandaid during the entire process, and my iron now has pencil shavings in it.
Some tips for other crazy moms considering a similar project:
- Be organized. Have every tool, bobbin, spool of thread ready every session. Have extension cords packed along with your sewing supplies. Have extra needles, sewing machine oil, fabric snips. Have enough pizza boxes to organize the students' supplies.
- Be on time.
- Have your sewing machine, and your volunteers' sewing machines clean and in perfect working order. Know how to fix common machine problems quickly. Have each volunteer bring the manual to her sewing machine.
- Have a list of substitute volunteers. We never had the same group of volunteers twice.
- If you tell the children they can do it, they can.
- Let the children do the work. Fudge later, if you have to.
- Be prepared for a great time!
If you'd like to share your story on these pages, please email Heddi at qwc@thecraftstudio.com.
© Copyright 1996-2012 Heddi Craft