Teaching kids to hand sew
Materials Needed
- Needles- size 6 or 7 sharps are good for most kids
- Thread- choose a good quality brand name in off white or gray, the cheap threads will break and shred
- Pins- I like the ones with large colored heads
- Pincushions for each kid- I use sponges cut into one or two inch squares
- Pencils- for marking sewing lines
- Quarter inch quilter's rule or other see through ruler- for marking sewing lines
- Needle threader- especially if you have trouble threading needles
Advanced Preparation
- Thread as many needles as you can and stick each one into it's own pincushion. I use a double thread tied in a knot no more than about 15 inches long after it is doubled.
- All pieces that are to be sewn together should be marked in advance with a pencil line for students to sew on. This is a good job for any volunteers you have or to do while sitting in front of the TV.
- Pin together the first two pieces of each block in advance. Use the same number of pins each time.
The First Lesson
The following is the basic script that I use when teaching kids to hand sew. You will probably want to use your own words and descriptions, though you are welcome to borrow any of mine. This is just to give you a basic idea of what I cover. I begin with a threaded needle, a pincushion, and two pieces pinned together.
I begin by explaining that all the sewing materials have the same rules as the things we use for science equipment (which can include rubber bands, staples, etc.): they are to be treated with respect and used only for the purpose intended. I tell them in advance that I know some kids like to stick needles in the top layer of their skin but that is not the purpose of these pins and needles. I know it "doesn't hurt" but I am responsible for them and I will not risk an infection.
Next I show the pinned pieces and explain that they will be sewing on the pencil line. I explain how accuracy is important so that all our blocks fit together. I show the threaded needle and explain they they will not have to thread their own (sighs of relief usually go up here).
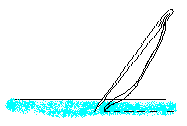
I show the students how to start at one end of the sewing line, usually on the right for right-handers. Then I show them the beginner's stitch. Stab the needle down through the pencil line, pull it all the way through, stab it up through the pencil line an eighth to a sixteenth of an inch away, and pull it all the way through, etc.
When you get good at that, I tell them, you can try semi-pro. Then I show them how to push the needle down through the pencil line just a hair and bring it back up again a short ways away and take one full stitch at a time.
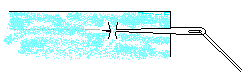
Finally, I say, if you get good at that you can try the expert method where you take several of the stitches on your needle before pulling it through.
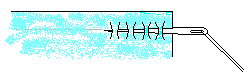
I tell them great quilters can get eight to twelve stitches in an inch, but I expect them to get at least six (then I accept five, shh, don't tell). I tell them about "toenail-catchers", stitches so big you can get a toenail caught in them and say they are forbidden.
About this time I've come to the first pin. I explain that you don't take out a pin until you come to it, and then it comes out of the fabric and goes directly into the "garage"-- the pincushion. In fact, any time you stop sewing, even your needle should be "parked" in the garage.
At the end of a line of stitching I show the students how to make a triple backstitch to tie off, instead of a knot. Three stitches one on top of the other will hold as well or better than a knot and is much easier for kids to do.
Finally, I explain that I will expect as many pins parked in the garage as I've used on each pinned piece as well as a needle before they can sew the next set of pieces.
I like to do this with no more than four kids at a time so that everyone can get in close and see. Other students can be working on picture blocks or some other activity.
The Day Everyone Sews
It's a good idea to have at least one other adult on the days everyone is sewing. One adult can rethread needles and pin the next piece or pair of pieces for the student's block while the other adult roams about the room helping kids untangle threads and fix mistakes. Two other adults are even better!
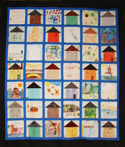
After the Blocks are Finished
I usually take the finished blocks home and press them before putting them together into a top.
© Copyright 1996-2012 Heddi Craft